Drawing Limits in Autocad 2007
Do you ever heard about LIMITS command? Many AutoCAD users think this tool is obsolete and not relevant anymore. It seems pretty useless.

Why do we have to set the drawing limits? We can arrange the drawing later in layout anyway. We try to set the limits, but we don't really see the difference. We can still draw outside of the limits anyway.
So let's see what we can do with limits in AutoCAD. You probably will find it useful in your job.
When do we use LIMITS in AutoCAD?
We use LIMITS command to set drawing invisible drawing boundary in our model space. This is very useful if you have to draw within a defined area.
But I don't see the difference on my screen. And I can still draw outside of the boundary.
That's not true. We will see about that later.
A good example in using LIMITS is when you need to draw schematic drawing in A3 paper size (or any other paper size). Schematic drawing is not to scale. So setting the boundary and having guides would be very useful.
Using AutoCAD LIMITS
You can set the drawing limits by typing LIMITS in AutoCAD command line then press enter. There are 3 options that you can use. The default is to specify the drawing limits.
Defining LIMITS
To define the drawing limits, you can pick points or type the coordinate. In below example, I set the drawing limits from 0,0 to 420,297. It is the size of A3 paper size.
Command: LIMITS
Reset Model space limits:
Specify lower left corner or [ON/OFF] <0.0000,0.0000>: 0,0
Specify upper right corner <420.0000,297.0000>: 420,297
Using LIMITS checking
By default, the limits checking is off. That is why you can still draw outside of the boundary. Now, let's try to turn it on and see how it works.
Type limits then press enter again. This time, choose ON.
Command: LIMITS
Reset Model space limits:
Specify lower left corner or [ON/OFF] <0.0000,0.0000>: ON
Now try to draw any object outside of the boundary. Now you only can draw within the drawing limits!
Working with grid Snap
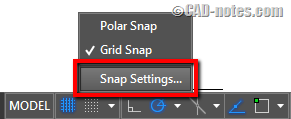
Let's explore further. We can use grid snap to work together with limits. Open the snap settings by clicking the grid snap icon, then choose snap settings…

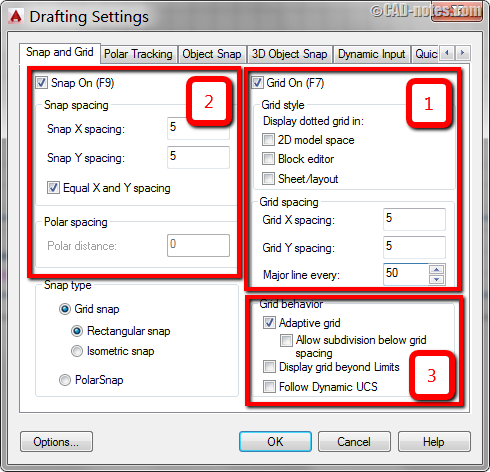
In this dialog we will explore some settings.
First, you can check "Grid on" to make it visible. You can also set the grid spacing in this category.
Second, you can force the cursor to snap to grid. The snap spacing isn't necessarily to match the grid spacing, but it would be more logical if you set the same value.
And third, you may want to uncheck "Display grid beyond limits". This will make the drawing limits more obvious.

Click OK to accept the new settings.

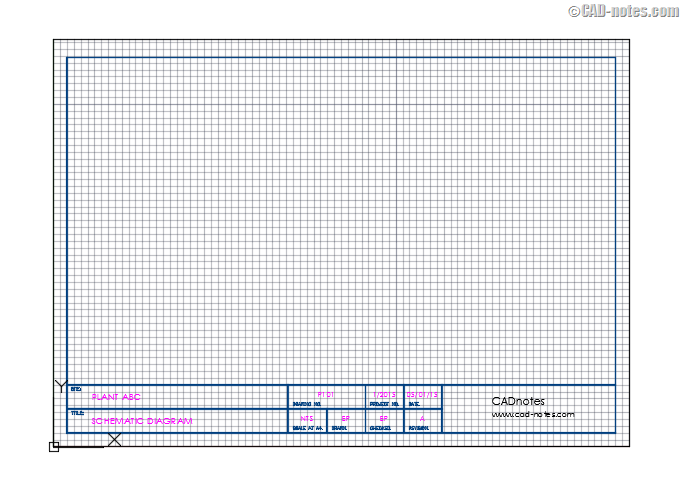
Now it begins to make sense, doesn't it? The grids will help to complete the drawing within the boundary.
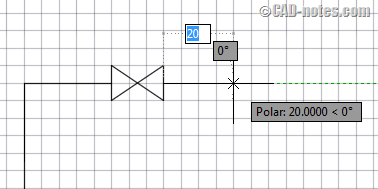
By setting the limits and grid snap, you can easily draw schematic drawing now. Not only you can see the drawing area easily, you can draw with specific unit distance easily. Without having to type the distance.
The grid spacing in this example was set to 5. So when you move your cursor, you will only can click distance 5, 10, 15, 20 and so on.

That is nice, isn't it?
Conclusion
Probably not everyone needs to use LIMITS. But it definitely not obsolete, we can still get the advantage of using it. In this example, in creating schematic drawing.
I believe there are some other types of drawings can use it. And if you think it can help with your work, please share it in the comment section here. We would love to hear your experience!
Source: https://www.cad-notes.com/autocad-limits/
0 Response to "Drawing Limits in Autocad 2007"
Post a Comment